Sunday 5 June 2016

How To Make Fluffy Waffles!

This is NOT your usual food post as you've seen in other blog(s) neither my usual skincare post.
I've tried and experiment a dozen of waffles recipes. I-do-not-like-them because it's neither fluffy nor crispy as they claim to be. I LOVE my waffle to be crispy and airy.
One such place that sells (to my standard) is: http://www.hatterstreet.com
I love their soya bean and grass jelly ice cream drizzle with gula melaka syrup. It taste so heavenly it's the yin to my yang. Alright back to MY waffle.
waffles
This is an imprompt blog post so don't mind those unplanned ugly food photos, alright? I'm staying real (in a screaming voice).
It took me a long time to finalize the amount of the ingredients for one person/small portion. A lot of the recipes that I have came across caters to at least a couple or more. I'm anal about it because I am the ONLY person in the house eats it and I do not like to have leftovers. Normally I eat this as a meal with no toppings and on the bright side it's easy to memorize.
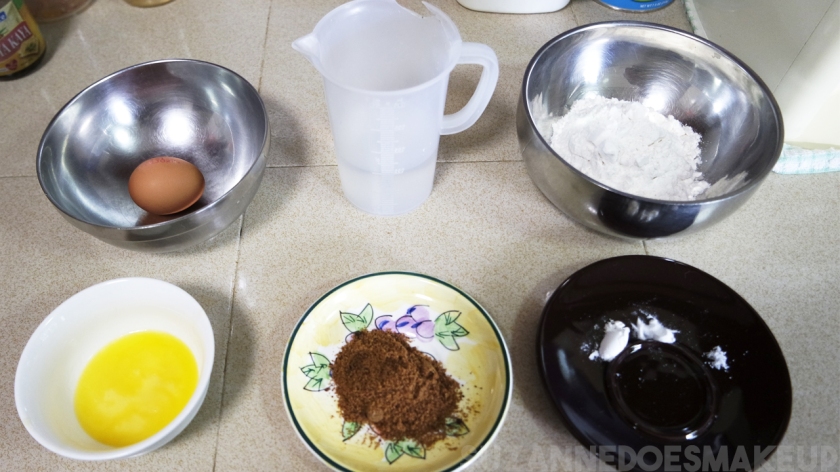
Ingredients
All you need are:
1 cup all purpose flour/self rising flour
1 cup of milk (If you ran out of milk like I do, you can use water)
4 tablespoon of sugar (I prefer brown sugar)
3 tablespoon of melted butter (If you ran out of butter replace it with oil)
A pinch of salt
A pinch of baking powder
A pinch of baking soda
1 egg, separate the yolk and white*
This is enough for 4-6 waffles. The cooking time is longer than my preparation. It only took me less than 5 minutes to done preparing for ingredients and a minute or two to mix everything together, provided you own an electronic mixer.
  • Mix all dry ingredients together (flour, salt, sugar, baking powder and baking soda)
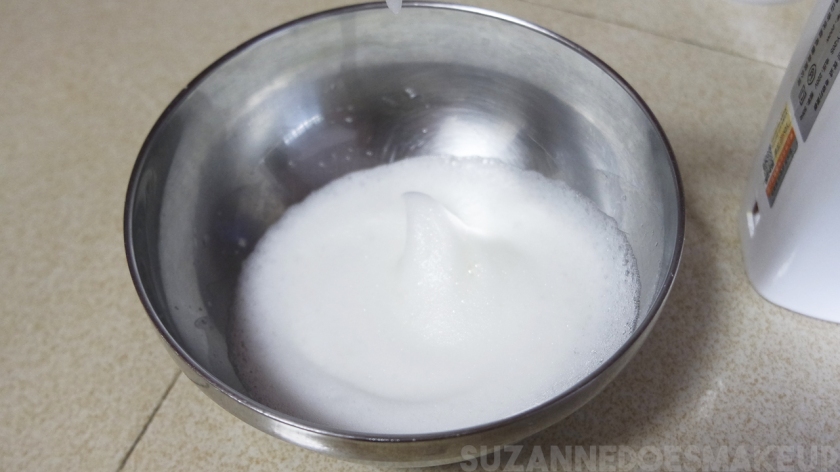
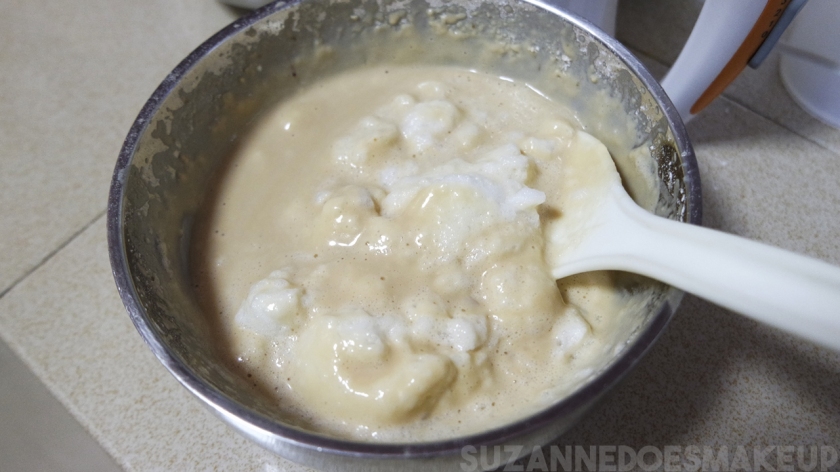
  • Whip the egg white till it foams (I whipped too much)
eggwhite
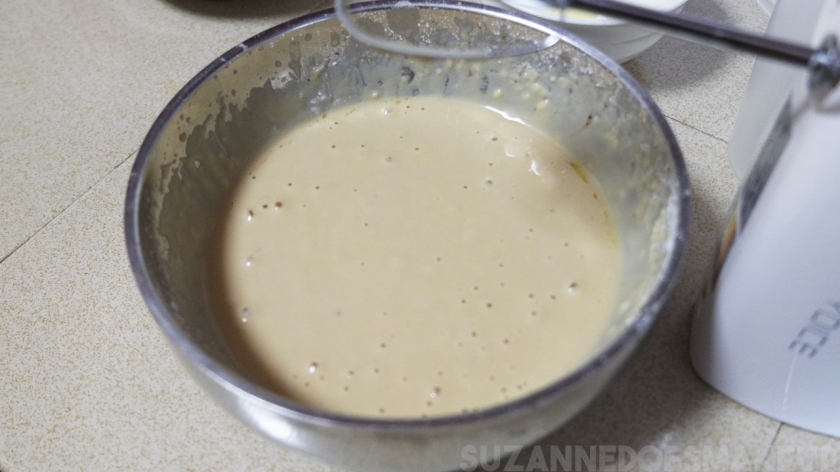
  • Add wet ingredients (milk, yolk and butter) to the dry ingredients
  • Mix it till JUST combine
batter
  • FOLD the batter and egg white with a spatula (I couldn't find one hence I used rice paddle)
battereggwhite
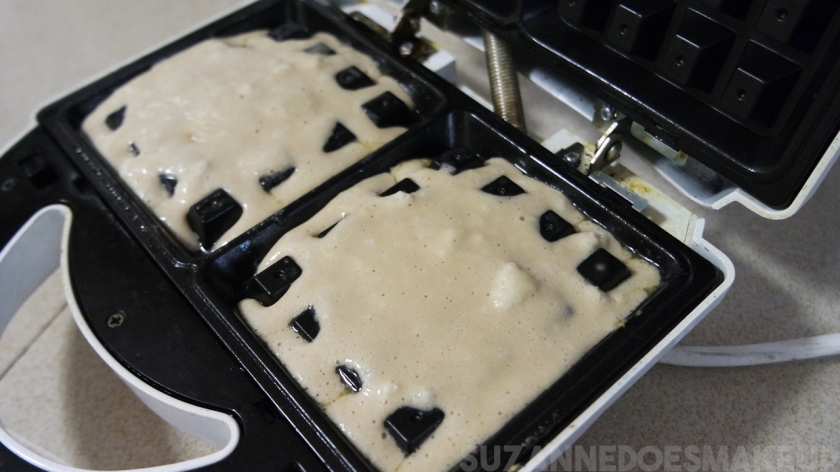
  • Grease the pan and pour the batter
  • Wait till it brown
wafflepan
It won't be as tasty if you were to replace milk as water. If you are someone who likes sweet stuff, do add a couple more tablespoons of sugar.
waffle2
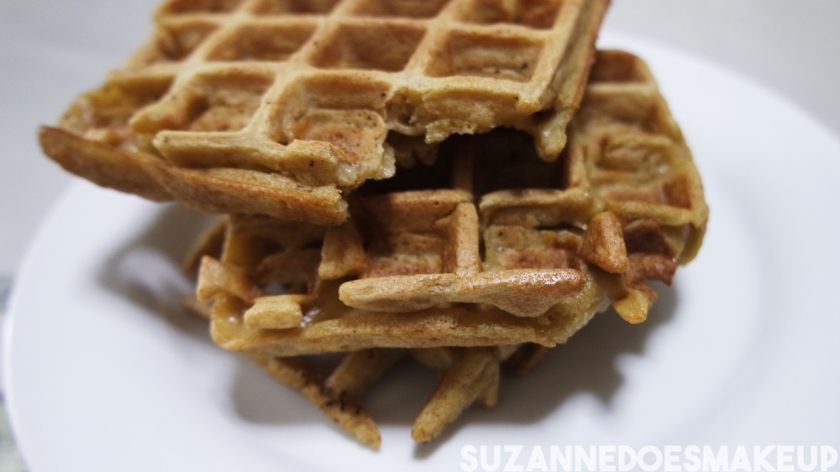
I hope you will enjoy my fluffy and crispy waffle recipe. Don't be like me and over whip the egg white.

Colour Correcting Concerns?!

Do read through my Colour Theory post to have a basic understanding of colours.
Ever had the moment when you put on your foundation or concealer you still visibly able to see the redness or the dark circles perhaps you're still looking dull. Chances that you will pack on more products onto your face and it became one inch thick of makeup. Imagine that, you have to spend a lot more on your makeup base, look cakey at the end of the day and still it's not going to cover up everything.
thick makeup
Colour correcting is amazing if you have a discoloration on your face that REALLY* needs to be address. Many companies make colour corrector way BEFORE colour correction hype in the social media. Let's face it, it has been in makeup industry for years and this is NOT a new trick.
Peach/Salmon Colour Concealer
benefit-erase-paste
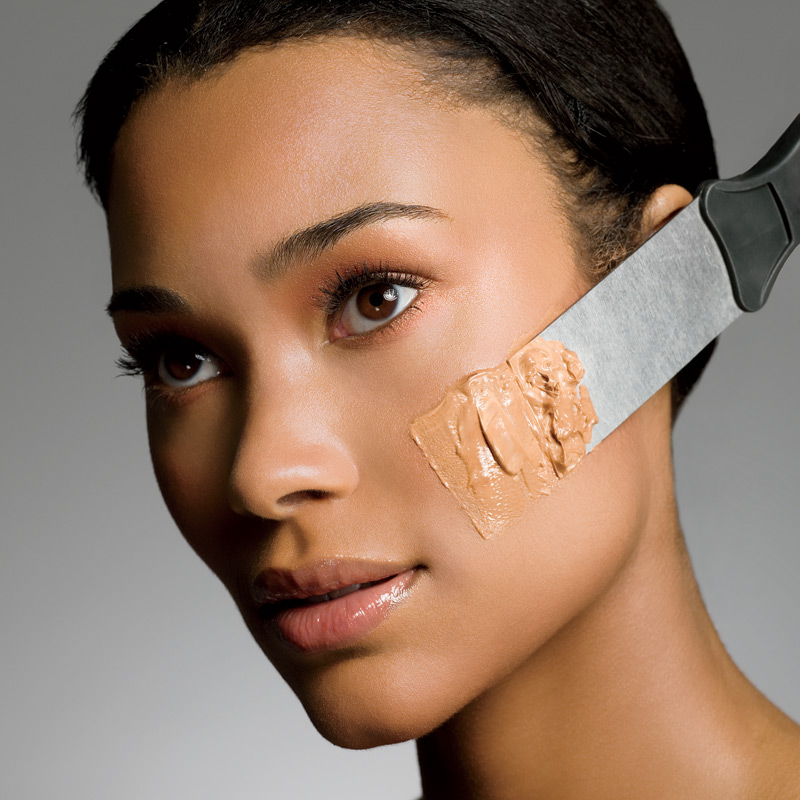
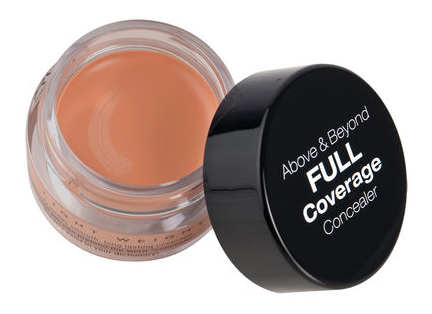
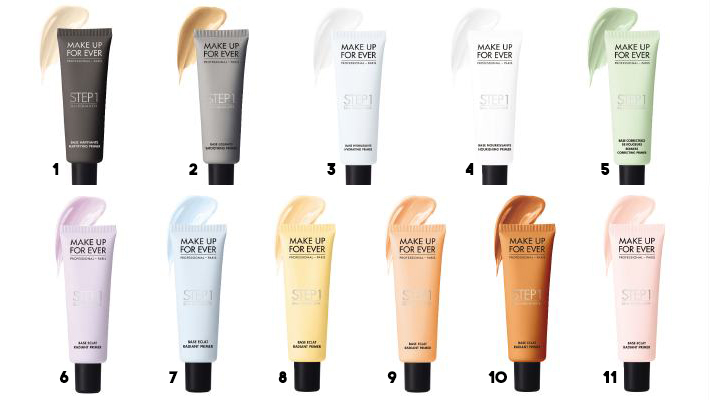
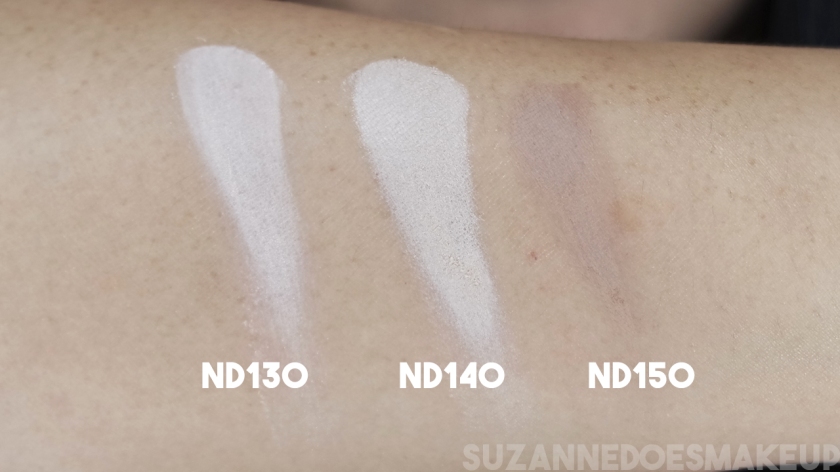
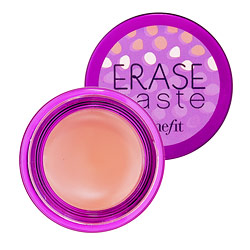
This orangey base shade is great for cancelling out the dark circles as it has a mixture of red, orange and yellow to counter act blue, purplish and sometimes a bit greenish under eye dark circles.
Orange Concealer
nyx orange concealer
This true orange base shade is suitable for coloured ladies. Same theory as salmon shade concealer but a higher concentration of red, orange and yellow to cancel out a darker blue and purple dark circles.
Yellow Concealer
Mars Yellow Concealer
This yellow concealer is more suitable for fair skin ladies. Works the same way as orange concealer but lighter in colour. It is great for brightening especially for medium to tan skin tone ladies.
Purple Concealer
purple primer
Purple helps to cancel out yellowish undertone and brighten up the face. However you can just get a purple primer instead. It works great as it won't have a purple hue peeking out under the foundation if you didn't blend out well.
Green Concealer
green concealer
Green is suitable for people who has skin condition such as rosacea. It helps to minus out the redness and it's better to use a green primer instead.
In my opinion, you can just get a salmon colour correction concealer for those serious dark circles. No one really needs to colour correct that much in the first place. Don't be fool by instagram "artists" makeup looks. However I do suggest you to grab a colour correcting primer instead. They offer colour correction and brightness WITHOUT any discolouration to the surrounding skin. They are amazing and too helps to prolong the wear of foundation. Needless to say you put on less layer of products and save a tad bit of money.

MUFE Primer

1: Mattifying Base - Shine Control
2: Smoothing Base - Pore Filler
3: Hydrating Base - Hydrating
4: Nourishing Base - Hydrating and richer in texture which is also suitable for sensitive skin user
5: Redness Correcting Base - Cancel out redness
6: Purple Radiant Primer - Illuminates muddy complexions and minimizes yellow tones
7: Blue Radiant Primer - Illuminates fair skin and minimizes slight redness
8: Yellow Radiant Primer - Illuminates medium and tan skin tones
9: Peach Radiant Primer - Illuminates light and medium skin tones
10: Caramel Radiant Primer - Adding brightness for tan and dark skin tones
11: Pink Radiant Primer - Brighten a yellow complexion
If you are into silicon base primer, Smashbox cosmetics manufacture them.
Now you know which colour correction primer to use and what you now need to know is how to use them which is very easy.
  • Start off with a clean face
  • Morning skincare routine
  • Use a hydrating/mattifying primer
  • Then use a colour corrector primer (you can skip the previous steps)
  • Foundation
  • Setting Powder
I hope this post helps you in choosing your right colour correction primer.


Original Post: https://suzanneworld.wordpress.com/2016/06/02/colour-correcting-concerns/

Know Your Undertone!

I have to study COLOURS in my tertiary years. To be honest this helps me out a lot. It saves me from a ton of trouble. Hence knowing your undertone colour helps you to pick the suitable ones in a blink of an eye. In short, it just makes your life easier, choosing of foundation color, wardrobe, hair color etc...and of course avoid mistake.
So what is undertone?
Your skin’s surface tone is the color that is often described as light, medium and tan etc. Your skin’s undertone is the color underneath the surface. You can have the same skin color as someone, but a different undertone.
There are three classifications for undertones: Warm, Cool, and Neutral.
  • Warm – Golden/Yellow/Peachy undertones
  • Cool – Pink/Blue/Red undertones
  • Neutral – Mix of warm and cool undertones colours
So how do you determine which one you are?
It's easy and simple. Just put out your hand and look at your wrist and check it in a natural lighting state. Look at your veins and what do you see?
  • Warm undertone: Green Veins
green veins
  • Cool undertone: Blue/Purple Veins
cool undertone
    • Neutral undertone: A mixture of Green and Blue Veins
neutral veins
For my colored friends:
If you see more of Yellow and Green veins - Warm undertone
If you see more of Blue veins - Cool undertone
If you see Blue and Green veins - Neutral undertone
Colour of the skin can change due to factors such as sun exposure, which is why some of us are lighter during winter and darker during summer. However our undertone will still remain the same.
Another way to determine your undertone is by what I like to call is the "White Test".
  • Stand in a natural lighting environment
  • Have a fresh face, without makeup or skincare
  • Take a white towel and drape it around your face
undertone test
If your face appears or look yellow - Warm.
If your face appears or look blue - Cool.
Go for the next stage of test if you still can't tell which undertone you are and that is the "Jewelry Test".
  • Take a gold and silver jewelry
gold silver test
If Gold compliment your skin better - Warm.
If Silver compliment your skin better - Cool.
If you can wear both - Netural.
Sadly, if you still can't tell which undertone..."Head For The Beach Test".
beach test
If you tan easily - Warm.
If you burn easily - Cool.
If...only if you still can't tell...(I'm gonna face palm myself here) this is one of the last resort that I can provide.
  • Take a photo of yourself WITHOUT makeup and skincare
  •  Place it over my gorgeous looking face down below
cool and warm palette
Whichever blends or looks better with your skin is your undertone. Can you tell which is mine? Even I had makeup on (because I just can't find any of my bare face photo) it's pretty easy to tell.
If you blends in with warm colour (left), you are warm undertone.
If you blends in with cool (right), you are cool undertone.
If you are either/neither, you are neutral.
I've learn another trick which is to use red and blue color. Look at the photo down below, which colour suit me more? Which colour doesn't make me look ashy? Which colour blends with me better?
red and blue
I tan easily. I have green veins as shown on the photo above and I blend and look better with/in red colour. I don't look dull instead I look much flattering with red colour hence I have warm undertone. yellow_caution_sign_And my VERY last resort if you still can't tell which undertone you are...
  • Take the photo as above and show it to your friend and ask them which looks better.
  • Ask your friend to look at your veins.
  • Ask your friend which gold/silver jewelry looks good on you.
  • Get your eyes check.
myth
Even you are a pale skin tone person that doesn't mean you have cool undertone and it goes the same for tan skin tone person. It doesn't meant they are warm undertone. Lastly NOT all asians are warm undertone because of their yellowish cast skin.
I hope this post has help and give you information on how to determine your undertone.
I will cover which undertone suits which colour in the next post. Cheers!

Original Post: https://suzanneworld.wordpress.com/2016/06/02/know-your-undertone/

Do You Have A Dehydrated Skin?

Do remember to read my previous post before you read this post.
By now we should know the differences between skin types and they are critical for treating the needs of our skin. However distinction between different skin types/conditions are not always as straightforward as they appear. I encounter many thought they are oily skin type because they see oil little do they know that they are wrong.
I am not surprise many of us associate dry as dehydrate because some of their symptoms are pretty similar. They are both:
  • Flaky
  • Itchy
  • Dull
  • Sensitive
  • Tight
  • Cause lines and/or wrinkles
The differences between Dry and Dehydrate skin are:
skin type vs condition

Oily skin can be dehydrate and dehydrate dry skin can be confused as being oily. Surprise?
When the skin is dehydrated it creates more oil to make up for the missing of water, it forms a barrier on the surface to prevent the loss of moisture. This is when dry skin type people thought they have oily skin types instead. Overproduction of oil to compensate for dehydration can create blemishes and even breakouts.
It doesn't matter which skin types you are. It is best always choose a product that helps to hydrate. I have an oily skin type but hydration is always my top priority than oil controlling. It is a staple item for any skin types.
Skin is our last organ that absorb water, hence the nutrients that it consume isn't enough. We need some external help such as Hyaluronic Acid and Glycerin.
[youtube https://www.youtube.com/watch?v=QSv2b8bjRlI&w=560&h=315]
[youtube https://www.youtube.com/watch?v=tOlc5MXLaOQ&w=560&h=315]

Do check out this post in regards of drinking water: https://suzanneworld.wordpress.com/2016/04/18/why-drink-water/


Original Post: https://suzanneworld.wordpress.com/2016/05/27/do-you-have-a-dehydrated-skin/

Zoeva Cosmetics: Nude Spectrum Palette

Sephora 20% Sales going on hence I can't miss out and so I bought Zoeva...It's a beauty. NO, I DO NOT FEEL GUILTY for spending.
Zoeva Cosmetics launched their "Spectrum Collection" which consist of eyeshadow and blush palettes on 11th January 2016 (I silently prayed and wish for a sales and it did). This particular palette that I bought, Nude Spectrum is derived from the beauty of the desert, mesmerizing Earth toned and subtle sandy shades with iridescent hues waft shimmering effects on lids just like a mirage in the Sahara desert.
zoeva
It cost S$59 ($38USD) but with 20% it's only S$47.20. Truth? Their original price is consider cheap as compare to palette such as Urban Decay Naked Palette which cost S$83 with only 10 shadows.
I do LOVE their packaging. It is a thin black matte cardboard palette. The material that they used which is a matte finishing surface with minimal rose gold letterings and holographic designs on it gave it a classy feel. I do know many doesn't really care much about their packaging design but I do...I just can't kick my designer habit away. I have a sweaty palm hence it will look grubby after use. It appears that the design is to be opened more like a book.
zoeva 4
Oh, they are manufactured with no parabens, mineral oils, fragrances and phthalates. Best of all, they are animal cruelty FREE! I am trying to use products that is cruelty free for years now. It's a struggle.
zoeva 1
It comes in 15 shades and each pan cost only S$3.93(o.o5oz). There's a mix of matte, metallic and satin shades in every eyeshadow palette. Don't worry, I'm going to collect them all, one at a time.
zoeva 2
I chose specifically Nude Palette because it's suitable for everyday wear be it morning or night, very classy brown nude shades. However I wish they should have switch the black with an even darker brown or muddy brown colour because there's black in almost every palettes that I own and I find that not much people using it. There isn't a mirror or a brush with the palette. The names of each shade is printed in a small letter above pan.
zoeva 3
It took me a week to finally to dip into the palette. I just can't bear to destroy it. Swatches are swipe without primer and it's from top right to bottom left (photo as above).
NS 1
NS 2NS 3NS 4NS 5
I was surprise when I first touch it. It indeed is very velvety smooth, soft and seamless. They are extremely pigmented and it glides on like a butter.
ND030 is the only shadows where it's patchy. ND130 and ND140 looks really similar. It will be better if they have a wider colour variation. I too hope they do have names for each shades instead of numbers, because one of the blush palette in Spectrum Collection shares the same numbers as this nude spectrum eyeshadow palette. Other than that I have not much of a complain.
Zoeva Cosmetics Full Face
Brushes is able to pick up the product really easily and they blend well. Downside of having such pigmentation shades is that they have bits of fallout but it's not as much as Lorac's.
Zoeva Cosmetics Eyes Only
I used ND150 and ND050 on my crease and ND090 on the main lid. Shadows applied really easily without any effort at all. I forgot to mention that ND100 is used on inner corner.

PS: There will be video(s) coming up in Mid June because I have already schedule the rest of my videos. The video will be about this look.

Get it here: https://www.zoeva-shop.de/en/spectrum-nude-eyeshadow-palette/a-9008749/
Or here: http://www.sephora.sg/products/zoeva-nude-spectrum-eyeshadow-palette
Or here: http://www.beautybay.com/cosmetics/zoeva/nudespectrumeyeshadowpalette/

Original Post: https://suzanneworld.wordpress.com/2016/05/20/zoeva-cosmetics-…spectrum-palette/

What Is Your Skin Type?

Do you know your skin type? Most people doesn't even know their own skin type. This is critical as you need to know what you are lacking of/needs. This is the first step in choosing the right skincare.
Don't worry if you do not know, I got you covered. All you need to do is just a simple test at home, it's free (or you can head over to your nearest skin care specialist which you need to pay).
  • Wash your face and let it start fresh.
  • Do not apply any products after you are done washing. Let it be for at least a couple of hours. You can do it while you're sleeping but avoid air conditioning.
  • So that the skin can return back to it's natural state.
  • If you can't tell, do take a before and after photo to compare.
  • First thing you should do is to touch your skin, especially the centre or T-zone area (forehead, nose and chin).
  • Next is to touch the C zone which is the outer part of the face.
  • How does it feel?
There are 4 basic skin types.
combi
The first type is Combination Skin Type.
Combination skin is when two or more different skin types occur on your face at the same time. Typically the center part of the face is oily and some parts of the face is dry.

dry
The second is Dry Skin Type.
You will feel a tight, rough, scaly skin and looking dull.
oily
The third is Oily Skin Type.
Breaking out a lot is the first sign. It looks shiny and greasy to the touch. You too will see a lot of black and white heads. The pores are visibly enlarge.
normal
The fourth is Normal Skin Type.
This is the skin which I envy most because it's the least problematic. The skin should feel vibrant, elastic, and supple.
Many people doesn't know that our skin type may be determine by many factors such as genetic and environmental. Genetic (and sometimes hormones) plays a big role in determining your skin types. If your parents have a certain trait, you are most likely to have it too. Environmental factors such as exposure to the sun, wind and cold weather climates may be the reason why you have a dryer skin type.
Now we are going to talk about skin condition. Your skin type is what you're naturally born with. Your condition, however, is something that can cause you to experience other problems such as acne and irritation. It can happen to anyone, temporarily or longer, and some for instances it can stay forever.
sensitive
One such example is Sensitive skin.
They are prone to rashes or red patches especially on the cheeks. Some might even feel a burning sensation, itchy and tight. Basic cleansers can sometimes be too irritating for people with sensitive skin.
aging
Aging Skin Type.
Aging skin type can be dull, pigmentation spotting, blotching, fine lines, wrinkles and it sags.
Distinction between different skin types are not always as straightforward as they appear. Many thought they are oily skin type because they see oil. Here I am going to solve this mystery...in the next post.
Do keep a watch out!

Original Post: https://suzanneworld.wordpress.com/2016/05/17/what-is-your-skin-type/

Peel Off Charcoal Modeling Mask

youtube thumbnail

This is my first time trying PEEL OFF mask. I know this is going to be fun. Anskin Modeling Mask is a product from Korea. It can only be found in salon in the past but now it can be found in many places. Now you can do your own facial mask in your own comfort area.
My only complain was the shipping. I ordered it on 8 March 2016 and it only reaches me on 29 March 2016. More than 2 weeks of waiting time. When I opened it, it was heavily bubble wrapped. I was so glad with it. The powder itself was sealed in a bag in the bottle.
There are 9 different types of mask for you to choose from. I have oily skin hence I chose Charcoal as it helps to combat against it. The main ingredients are:
Charcoal Powder: Deep Cleansing, Absorb oil and dirt, Purify
Licorice: Moisturzing, Anti-inflammatory, Sooting, Antioxidant
Allantoin: Emollient (Do read my post on Nivea Post Shave Balm, it explain what is emollient.)
Sodium Hyaluronate: Retain moisture
As per instruction, ratio of powder to water is 1:0.8 however...I used 3 tablespoon of it with 7 spoonful of water. So I suggest you to add spoonful by spoonful of water and not everything at a shot. So mix everything together into a semi liquid consistency. Add a bit more water if you want to have more time to manipulate the mask. I would say to put on a thick layer so that it can be peeled easily without any extra effort.
It feel so cooling when I first applied it on face. At first I was worried that it will pull my hairs off so I was really careful around my eyebrow but don't worry it didn't happened even when I cover up my brows with it. It took less than 10 minute to dry completely but I left it on for another 10 minute to enjoy the cooling sensation. It doesn't feel uncomfortable on face.
before and after
Upon taking it off I can tell that my skin looks a tad brighter and rosier. The spot in between my eyebrow is less visible. My face feels cooling and moist at the same time. I knew I was already in love with it, making my skin feels so soft.

[youtube https://www.youtube.com/watch?v=aw7kKzb6dbg&w=560&h=315]

Find it here at:
http://www.qoo10.sg/g/421073992/Q101165123
I bought it at $17.90SGD inclusive of shipping but I think they have increase the price by $1SGD.

Original Post: https://suzanneworld.wordpress.com/2016/05/14/peel-off-charcoal-modeling-mask/

Hierarchy/Types of Beauty and Skincare Brands

Many people doesn't understand the hierarchy of the cosmetics brands so I've compile a list.
High End:
-Anna Sui
-Aveda
-Bobbi Brown
-Bvlgari
-By Terry
-Cargo Cosmetics
-Chanel
-Chantecaille
-Charlotte Tilbury
-Clarins
-Clinique
-Cover FX
-Dermablend
-Dior
-Edward Bess
-EM Cosmetics
-Ellis Faas
-Estee Lauder
-Face Atelier
-Glamglow
-Giorgio Armani
-Givenchy
-HourGlass
-IOPE
-Illamasqua
-Korres
-La Prairie
-Lancome
-Laneige
-LIT Cosmetics
-Living Proof
-L'Occitane
-Marc Jacobs
-Mehron
-Moroccanoil
-Nars
-Natasha Denona
-Paul & Jo
-Paul Mitchell
-RCMA
-RMK
-RMS
-Rouge Bunny Rouge
-Shu Uemura
-SkinCeuticals
-Skin Illstrator
-Ted Baker
-Viseart
-Wayne Gross
-YSL
-Zoeva
Mid End:
-Anastasia Beverly Hills
-Autograph
-Bath and Bodyworks
-Bare Minerals
-Beauty Blender
-BECCA
-Bed Head
-Belif
-Benefit Cosmetics
-Ben Nye
-Bite Beauty
-Bliss
-Butter London
-Buxom
-Cake Beauty
-Chi Chi Cosmetics
-Cinema Secrets
-Daniel Sandler Makeup
-Doll Face Mineral Makeup
-DuWop
-Eyeko
-First Aid
-Formula X
-Graftobian
-Global Art
-Herbal Essences
-Holika Holika
-Inglot
-Jeffree Star Cosmetics
-Kat Von D
-Kiko
-Lanolips
-LimeCrime
-Lipstick Queen
-Living Nature
-Liz Earle
-LUSH
-Make Up Geek
-Make Up Forever
-Melt Cosmetics
-Missha
-Model Co Cosmetics
-Moonshot
-M.A.C
-Napoleon Perdis Cosmetics
-Nutrumetics
-Philosophy
-Real Technique
-Sigma
-Smashbox
-Stila
-Sugar Pill
-The Body Shop
-Too Cool For School
-Too Faced
-Tony Moly
-Topshop
-Urban Decay
-Victoria Secret
-XO Beauty
-Yves Rocher
-3CE
Low End:
-Australis
-Art Deco
-Banila Co
-Barry M
-BH Cosmetics
-BM Beauty
-Bourjois
-Burt's Bee
-BYS Cosmetics
-B.
-Catrice
-Coastal Scents
-Colourpop Cosmetics
-Collection 2000
-Covergirl
-Clean Brush Shampoo
-Clio
-DB Cosmetics
-Dove
-DragonBerry
-Eco Tools
-Etude House
-Essence
-E.L.F
-Face of Australia
-Fashionista
-Garnier
-GOSH
-Hard Candy
-Innisfree
-Innoxa
-Jordana
-L.A. Girl
-Leaders
-Loreal
-Makeup Revolution
-Maybelline
-Max Factor
-Milani
-Mirenesse
-Models Own
-MOR
-MUA
-Nature Republic
-Neutrogena
-No 7 by Boots
-NYC
-NYX
-Olay
-O.P.I
-The Face Shop
-Paw Paw
-Peripera
-P2
-Rimmel London
-Sally Hansen
-Sleek
-Skinfood
-Sonia Kashuk
-Ultra
-Vaseline
-Velourlips
-Wet N Wild
-2True
*Based on your own country currencies, some low end brands may even be consider as mid end brand.
*This is just a rough guide.
*Some brands are consider as prestige brands.

Lovemore Hyaluronic Acid Hydrating & Cleansing Bubble Mask

Love More Bubble Face Mask 2 Thumbnail
After trying Elizavecca Milky Piggy Carbonated Bubble Clay Mask (http://wp.me/p5nzEc-7z) hence I must try this cleansing bubble mask. I bought mine at Watsons at $5.90SGD and of course I bought it with discount hence it's 2 for the price of $5.90SGD.
There are 3 types of bubble mask, Hyaluronic acid, Tea Tree and Arbutin. I chose hyaluronic acid and tea tree because hydration is super important despite any skin type and my face is oily hence these two choices.
Love More Mask
The main ingredient of the mask are:
Fermented soybean extract: Whitening and Antioxidation
Ginkgo extract of mistletoe: Anti-aging and Antioxidation
Imperata root extract: Moisturizing and Anti-aging
Hyaluronic acid: Moisturizing
Glycerin: Moisturizing, Anti-aging and Smoothing
When I opened it, it feels so slimy and soapy. The texture of the facial mask is quite thick. I guess it is to absorb decent amount of product to produce more bubbles afterwards. Deep down I'm pretty sure it won't foam up as much as what the picture shown and true enough I was right.
Love More Mask2
It foam up only to this much at 3min mark. The only place that it truly foam up was on my chin.
Love More Mask4
The bubbles that foam up is very much like facial wash bubbles.
Love More Mask3
As per direction said to leave it on for 10 min and massage afterwards before rinsing off. It feel so much like a typical facial wash solution texture when I touch and during rinsing. But I can see my face is a tad brighter and I too can feel that my skin is being pulled especially the areas around my mouth and my forehead. The texture of my face feel soft, tender and bloated, like a bubble that is filled with water.
Before And After
I do recommend you to try the mask, it works but it's gimmicky and only buy it when they are having sales.

[youtube https://www.youtube.com/watch?v=b7-0h0l43-8&w=560&h=315]

Original Post: https://suzanneworld.wordpress.com/2016/05/08/lovemore-hyaluro…sing-bubble-mask/