Thursday 18 August 2016
Kat Von D: Lock It Foundation
I have waited for so long.
I have waited for so long for Kat Von D.
I have no confident in buying foundation over the website.
I'm just so glad it came and I can FINALLY try the foundation first hand without any screw ups.
It cost $56 for 30ml. It wasn't as expensive as compare to the other brands, it is still affordable. You don't need to use a lot for this particular foundation and I will tell you guys why down below. So keep on reading!
I actually love their packaging. There's a modern gothic feel to it which is the signature of Kat Von D's. Some curves, rose, black and gothic. The bottle is designed in a way that it will never get in contact with the air, to prevent it from contamination and maintain the formula consistency.
I love the design of the "lock" and at the same time it is a very troublesome lock. You have to pull it open to use the pump and clip it back once you are done. So if you lost it, that's it.
One thing I love about that it can prevent from accidental pumping while it is kept in a bag as the lock isn't too easy to dismantle.
I have been dying to try this foundation as it is known for 24 hours wear and matte finish. Best of all? Super high coverage as this is cater to cover up tattoos!
One awesome thing about Kat Von D Beauty that it is CRUELTY FREE! Kudos to it!
Lock It Foundation is super creamy, thick and pigmented as this is deprived from the mindset to cover up tattoos hence the coverage is surreal. You don't need a lot to mask all of your face. A little goes a long way.
I used it with my Sigma Flat Angeled Kabuki F88 for the first round. I do see some streaks when I brush it across my cheeks. However I do find that it's better to use it with a wet beauty blender instead. It made the foundation looks more like skin.
The product dries up quick hence it's advisable to apply a small portion of your face first. I love this foundation because it dries up matte too.
This is my face at 3am when I just applied. Please don't asked me why I do this at a weird timing because I'm probably still quite awake and trying to find something to do at this holy hour.
I'm someone who doesn't like wearing foundation and I showed to a couple of friends and they too said it looks natural as if I'm not wearing any foundation and my skin is looking great. Like I said earlier, I'm someone who hates wearing foundation hence I still felt I've something on my face despite I've only put on less than a pump.
I took another photo at 4am. There's tad of oiliness on my nose however it still stay matte for the rest of my face. Normally my nose and cheeks will be greasy after 30min. So far, this foundation is amazing. It still look natural on me.
Beside setting powder, I did not put on any contour or highlighter.
I had eyebrow, eyeliner, mascara and lipstick on.
Frankly I too want to see how well this foundation can last at the corner of my left eye.
I slept for 5 hours and this is taken at 9am. The most greasy part of my face is the nose followed by my cheeks. However it is still not as greasy as the other brands I've used.
Area under the eyes seemed to cake as I did add a little bit more of the foundation to cover up my dark circles. There's no sign of wearing off beside the area at the corner of my tears where I teared.
Not so sure was it just me, I find that my 9am face looks much brighter than 3am. Looks even more like skin with the shine.
If you're curious, I'm using Medium Netural 54. I'm somewhere in between Medium Netural 53 and 54. 53 is a tad pinkish as compare to 54 which is a tad yellowish. 54 looks much closer to my skin and natural as 53 doesn't match up to my neck/shoulder colour.
I will make a video about Kat Von D's Lock It Foundation. It truly recommend you to get it and try it on yourself. It's pretty awesome.
Still super stroked to meet her! Yes, I'm vlogging! Do keep your eyes peeled!
https://www.youtube.com/watch?v=8Uu4mu_PlAs
https://www.youtube.com/watch?v=VqcVkEXMY_Q
Wednesday 27 July 2016
Face Slimming Tool: Gold T Bar
This may be one of my weird beauty product and it is famous in Japan and Taiwan. Surprise...surprise. FACIAL SLIMMING PRODUCT!
This is a 24K face massaging tool. Using nanometer technology to help massage your face by vibrating 6000 times a minute which provides enough stimulation to the facial muscles for firming effects and by firming I meant skin tightening and lifting. It ALSO claims to provide skin whitening benefit. Do not take my words for it if you can't see any whitening effects as I cannot attest to it, too.
It helps to reduce wrinkles around the eyes and forehead. If you suffer from sagging cheeks, water retention and puffiness it does the magic and the result will be shown immediately upon using it. Did I mention it also help in facial blood circulation too?
It is waterproof and operate by one AA battery, of course battery is not included when you purchase this vibrator. Just undress the "switch" and penetrate it with the battery and it will work (NC17).
It's pretty easy to use however I would suggest to use it only after your skincare routine as it too helps the skin to absorb more products. Do put on a tad more face moisturizer as it helps it to glide on smoothly without any tagging.
Hold the tool near the bottom to get maximum effects. You should not use any force while gliding it across the cheek. Normally I like to use it at night before I put on facial mask to end things, of course you can use it while you are in shower as it's waterproof.
First, place it on the forehead and glides it towards your hairline. This is to omit heavy and furrow brow lines.
Second, place it at the side and glides it towards the hairline moving in a diagonally upwards motion. Say BYE to crow's feet.
Third, I like to let it sits under my eye for 10 - 20 seconds to minus out my eye bag.
Fourth, place it next to the nose and glides it towards the hairline moving in curve upward motion as shown by the arrow as I don't need any sunken cheeks.
Fifth, place it at the smile line and do the same motion as step four or you can let it sit for a good 10 second before massaging.
Sixth, place it at your jowl and glides it in an upward motion towards the center of the ear.
Seventh, place it under assume turkey chin and glide in a downwards direction.
Always massage from the top to the bottom as it too helps with the blood circulation towards the heart. I did took a before and after but I am going to show you people one side of my face, first.
They are both left side of my gorgeous face but I flipped my "before" photo to match the "after". I can immediately tell that I have a less visible eye bag and smile line and side of my face looks a tad slimmer. I too have a much sharper jowl.
I massaged each set for 20 times and of course you can do more. However I must warn you that it feels so ticklish due to the vibration. If you are confuse about how to massage your face don't worry and just remember this method, massage everything in an UPWARD diagonally motion towards the hairline/ear and hold that ending position for a couple of second and continue.
After using it, clean it with a kleenex and store it in your drawer, very simple. I do hope you will find joy in using it!
You can get it here at S$10 excluding shipping fees.
Saturday 16 July 2016
Do You Know Your Colours? | Colour Theory
Do read my previous post on Knowing Your Undertone before reading this.
Colour theory in short is color mixing and the visual impacts of color combinations. An artist/designers should understand the basics of colour theory in order to know how colors work with each other, and how one colour will influence another by placing it next to each other or even how the color will result in when you mix them together.
Sir Isaac Newton is the founder of Colour Wheel. He then split the sunlight into red, orange, yellow, green, blue, indigo and violet which is what we now known as the rainbow. He then joined the two ends of the colour together and it show a natural progression of colours.
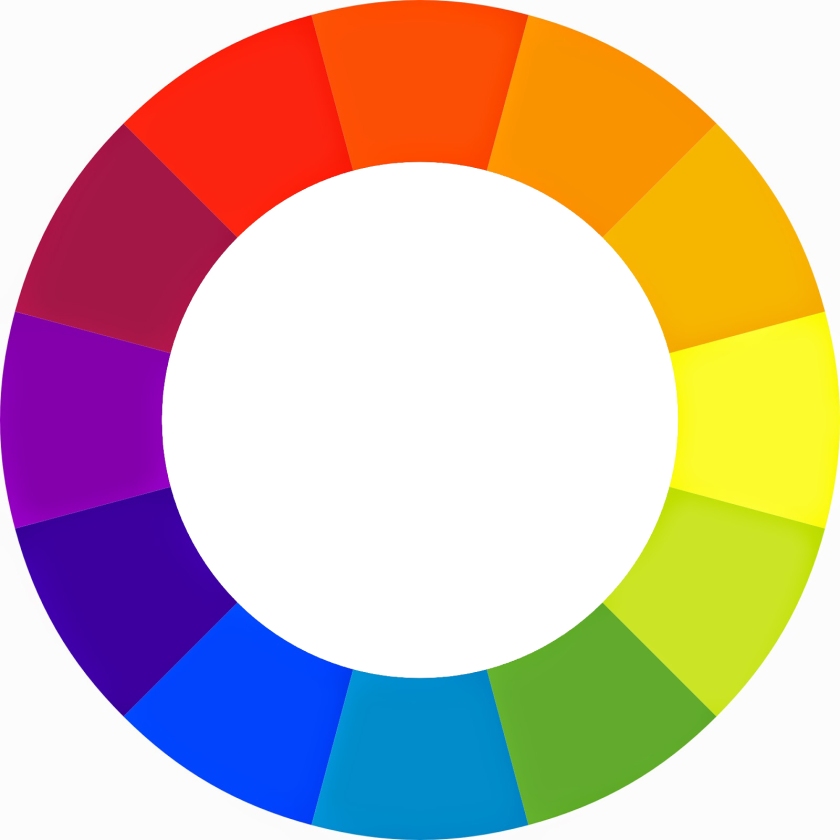
There are many different kinds of colour wheel in the market and the one I'm showing you (down below) is the most basic colour wheel you can find online.
Primary colours are the ONLY three colors that cannot be mixed or formed by any combination of other colors. All other colours are derived from these three colours.
Primary Colours: Red, Yellow, Blue
Secondary colours is by combining two of the primary colours.
Secondary Colours: Green, Violet, Orange
Yellow + Blue = Green
Blue + Red = Violet
Red + Yellow = Orange
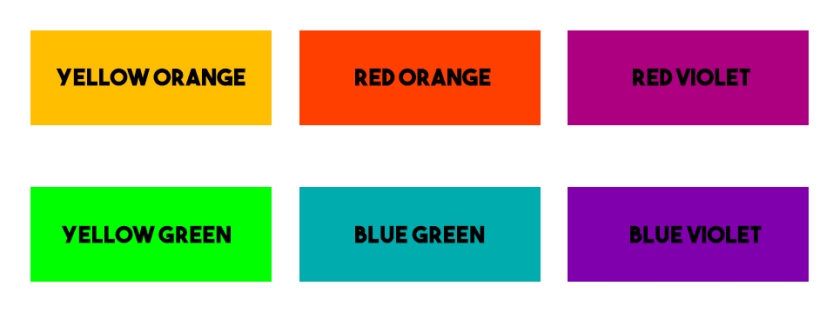
Tertiary Colours: One primary colour combine with one adjacent secondary colour.
Yellow + Orange = Yellow-Orange
Red + Orange = Red-Orange
Red + Violet = Red-Violet
Yellow + Green = Yellow-Green
Blue + Green = Blue-Green
Blue + Violet = Blue-Violet
Now we all know these are the colours spectrum from the colour wheel and we too learned about Warm and Cool undertone in the previous post. Do you know there are warm and cool colours in colour wheel too?
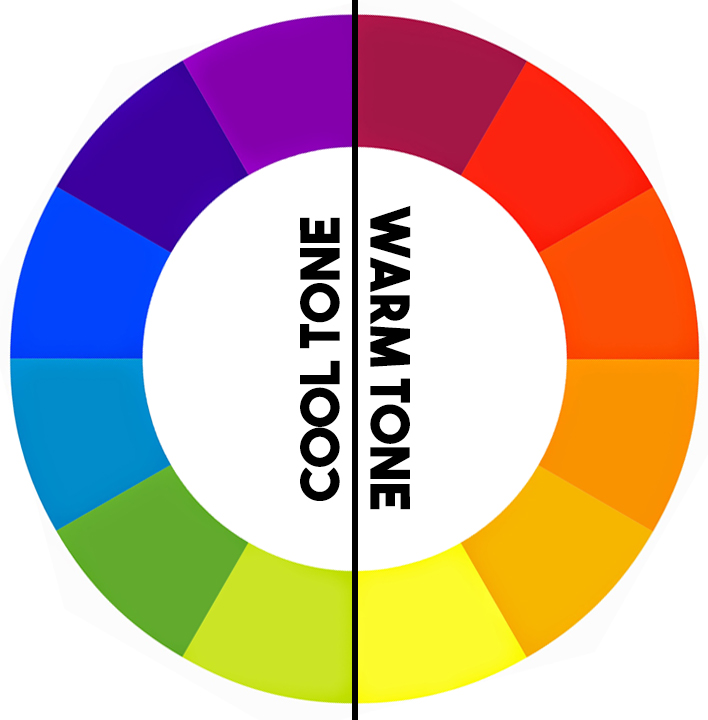
Warm Colours: Red-Violet, Red, Red-Orange, Orange, Yellow-Orange, Yellow,
Cool Colours: Violet, Blue-Violet, Blue, Blue-Green, Green, Yellow-Green
The color wheel can be divided into warm and cool colours. By understanding the differences of warm and cool colors, it will help you better in foundation/concealer colour matching if you are a makeup artist.
Warm colours are over whelming, vivid, bold and popping colours.
Cool colours are calm, soothing, laid-back and cold.
Any colours can be of warm and cool tone. For example, if a red lipstick that has a blue base, it's a cool red. If it has an orange base, it's a warm red. Whichever colour that has more of a blue, they will always be a cool tone colour and whichever colour that has more of a yellow is a warm tone colour.
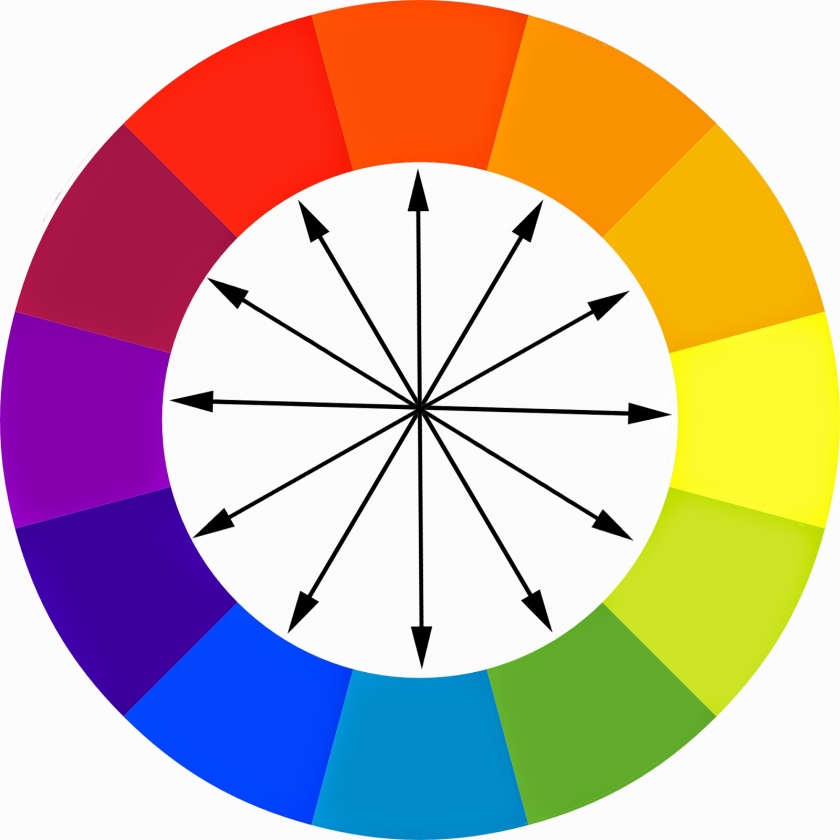
Ever heard of Complementary Colours?
Colours that are opposite of each other on a colour wheel is known as complementary colours. They bring each other out making a visual contrast, thus both colours appear stronger against each other.
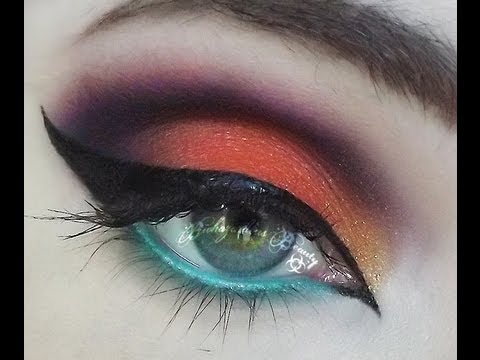
If you have a blue eyes, using yellow based gold eyeshadows will make it stand out even more.
If you have green eyes, purple eyeshadows will be your best friend. It will complement your eyes and bring the attention to it.
Complementary colours is not only useful in choosing the right shades of shadows, it also helps to counter act against the colour you do not want to see it on your skin. It is known as Colour Correcting in make up artistry. As opposite colours helps to bring out a strong visual contrast it too helps to cancel each other out.
For example, green concealer works best to cover up blemishes. Orange concealer works best to cover the dark circles. Purple concealer is able to cancel out any yellow undertone and that will makes you look brighter.
Monochromatic color schemes are made up of different tones, shades and tints within one colour.
Tints: Adding white to a colour
Tones: Adding gray to a colour
Shades: Adding black to a colour
Ingot Cosmetics is using the method of monochromatic system to sell their eyeshadows.
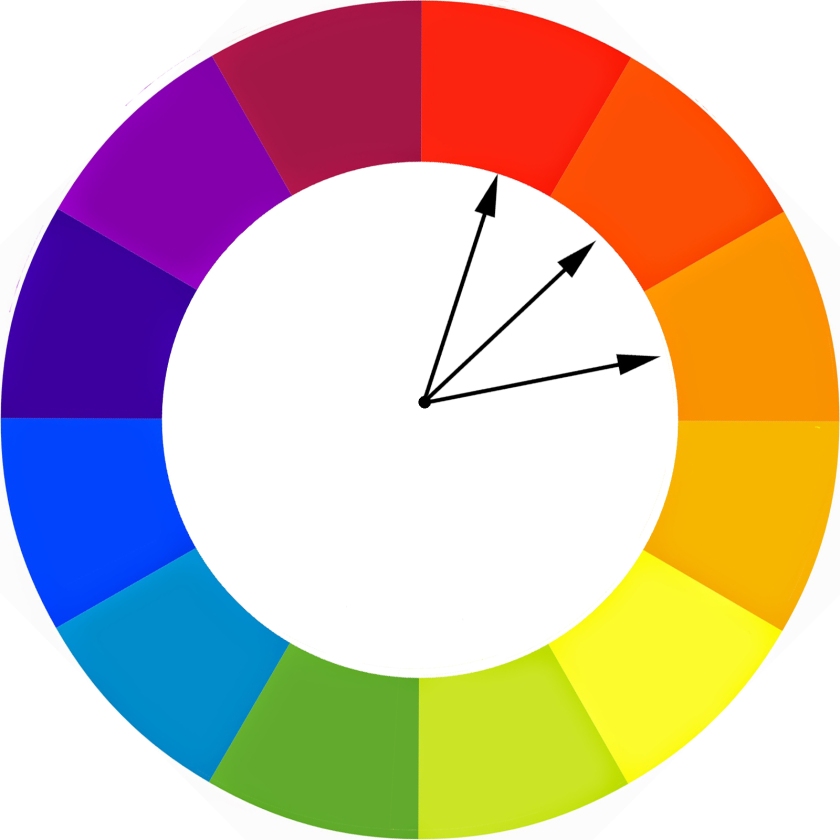
Analogous colours uses colours that are adjacent to each other on the color wheel. One color is used as a dominant color while the other two are used to enrich the scheme. The analogous scheme is similar to the monochromatic, but offers more nuances.
Triadic Colour is another type of colour scheme. It uses three colours equally spaced around the color wheel. To put it simply, draw a triangle in the middle of the wheel and use the colours that the three points of the triangle land on.
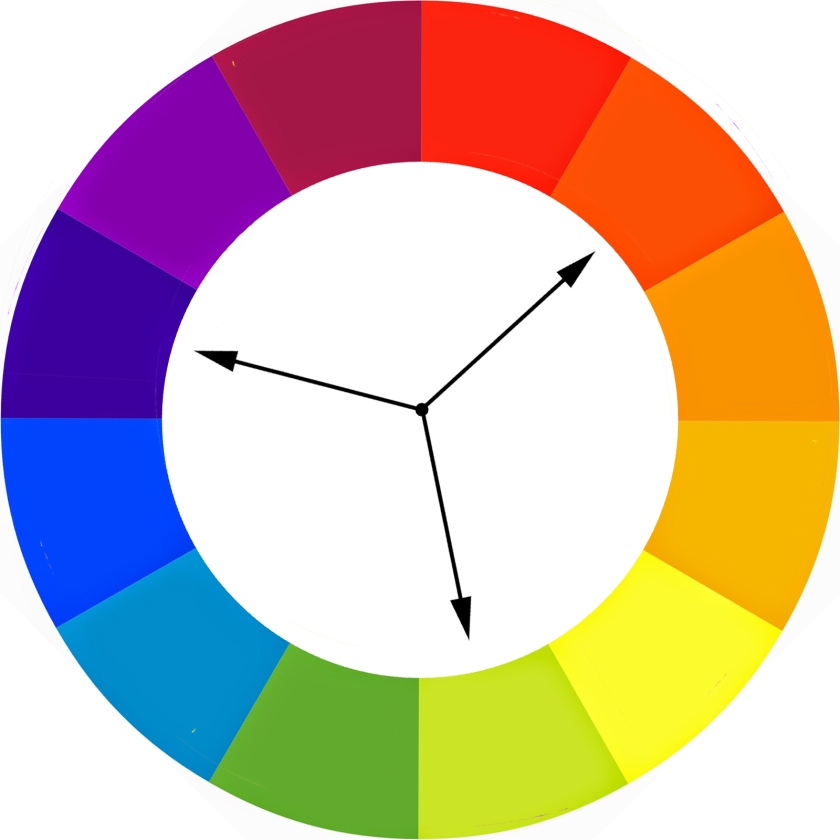
The triadic scheme is not as contrasting as the complementary scheme, but it looks more balanced and harmonious.
Last but not least, Tetradic colour. It sound complicated but it's just two sets of complementary colours. It works the same as triadic colour instead of a triangle, you should draw a rectangle instead. The only way to use this scheme is to choose one dominant colour and subdue the other three.
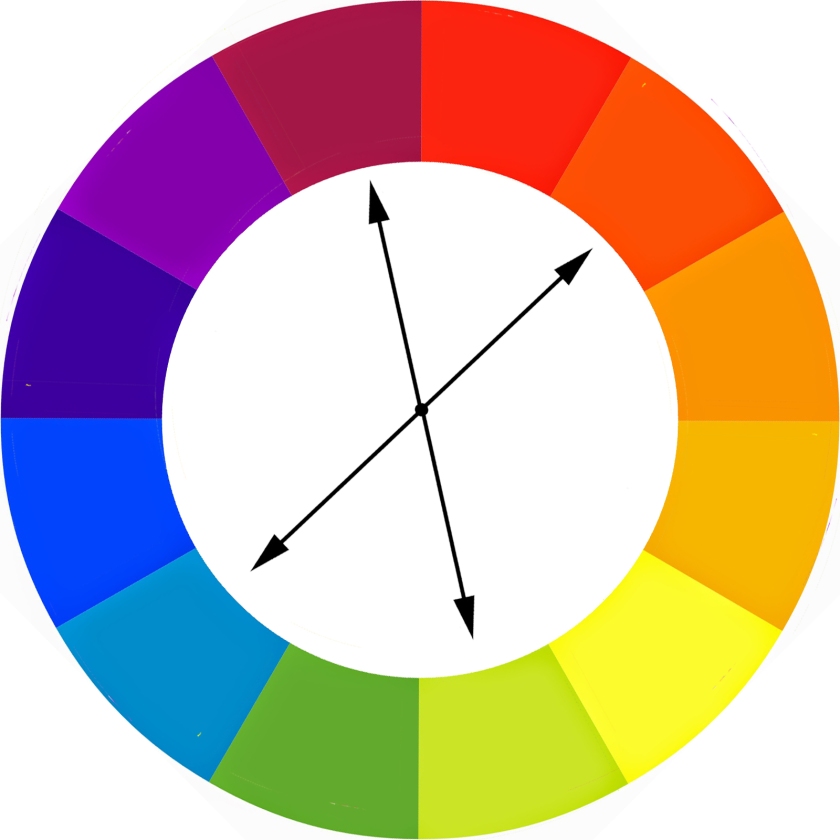
Do understand that Color Theory analyzes only the relationships of colors; it does not take color lightness and saturation into account.
I too suggest you to check out Adobe Kuler. They are like your online colour wheel however it's still handy to own a physical colour wheel in your kit.

Do you know that if you spin your colour wheel fast enough it will appears white? Because all the colours of the rainbow make up visible light.
Sunday 5 June 2016
How To Make Fluffy Waffles!
This is NOT your usual food post as you've seen in other blog(s) neither my usual skincare post.
I've tried and experiment a dozen of waffles recipes. I-do-not-like-them because it's neither fluffy nor crispy as they claim to be. I LOVE my waffle to be crispy and airy.
One such place that sells (to my standard) is: http://www.hatterstreet.com
I love their soya bean and grass jelly ice cream drizzle with gula melaka syrup. It taste so heavenly it's the yin to my yang. Alright back to MY waffle.

This is an imprompt blog post so don't mind those unplanned ugly food photos, alright? I'm staying real (in a screaming voice).
It took me a long time to finalize the amount of the ingredients for one person/small portion. A lot of the recipes that I have came across caters to at least a couple or more. I'm anal about it because I am the ONLY person in the house eats it and I do not like to have leftovers. Normally I eat this as a meal with no toppings and on the bright side it's easy to memorize.
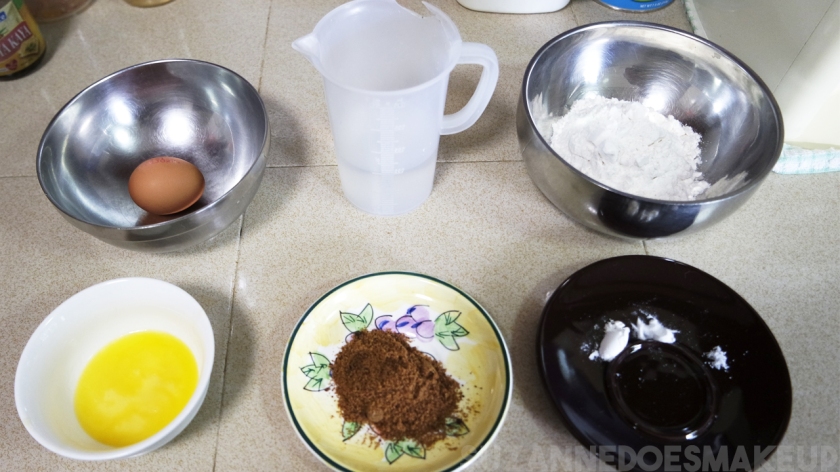
All you need are:
1 cup all purpose flour/self rising flour
1 cup of milk (If you ran out of milk like I do, you can use water)
4 tablespoon of sugar (I prefer brown sugar)
3 tablespoon of melted butter (If you ran out of butter replace it with oil)
A pinch of salt
A pinch of baking powder
A pinch of baking soda
1 egg, separate the yolk and white*
This is enough for 4-6 waffles. The cooking time is longer than my preparation. It only took me less than 5 minutes to done preparing for ingredients and a minute or two to mix everything together, provided you own an electronic mixer.
- Mix all dry ingredients together (flour, salt, sugar, baking powder and baking soda)
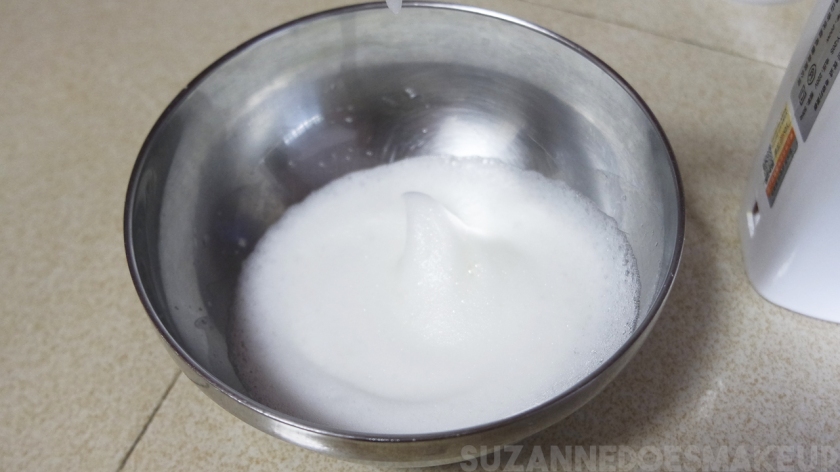
- Whip the egg white till it foams (I whipped too much)
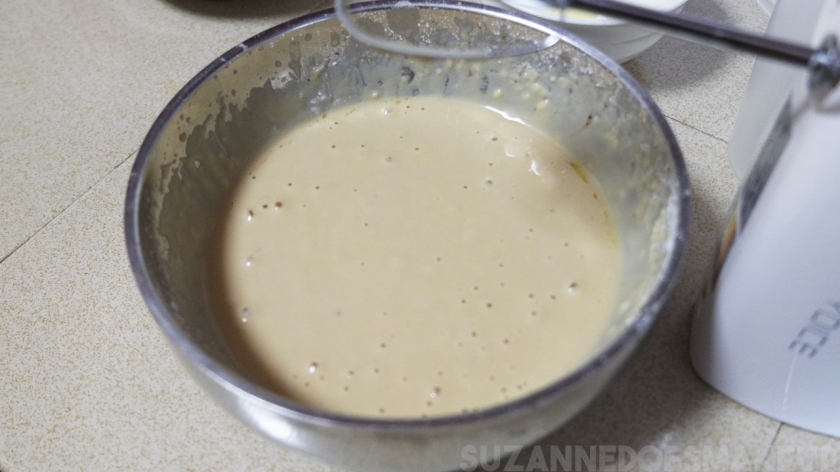
- Add wet ingredients (milk, yolk and butter) to the dry ingredients
- Mix it till JUST combine
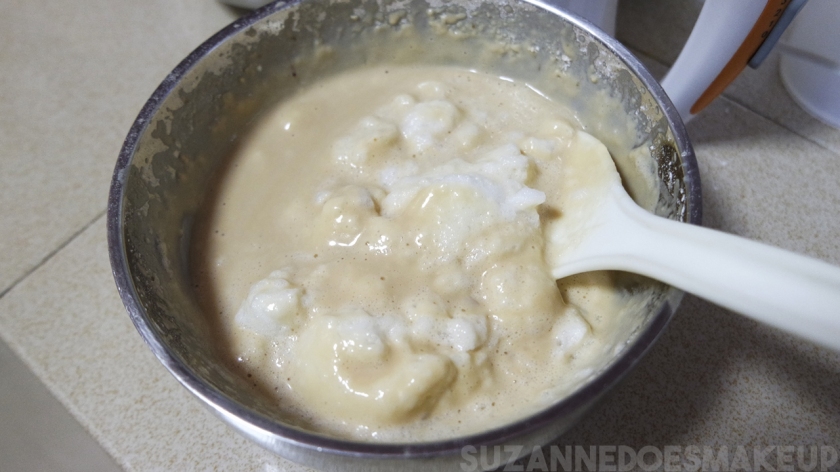
- FOLD the batter and egg white with a spatula (I couldn't find one hence I used rice paddle)
- Grease the pan and pour the batter
- Wait till it brown
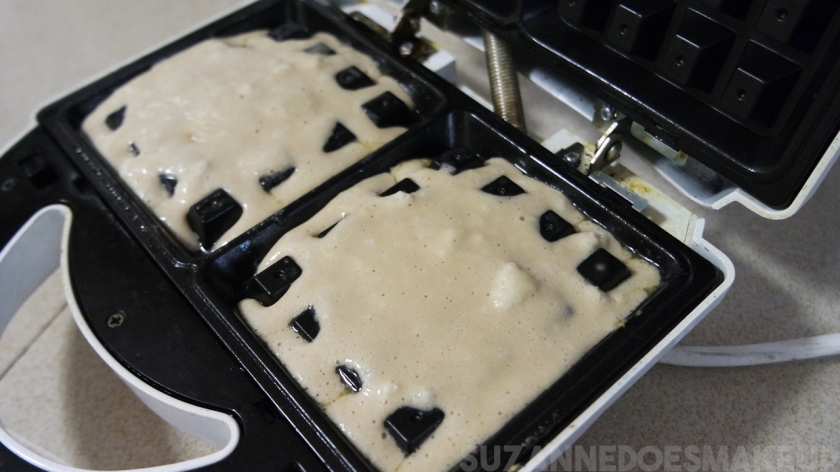
It won't be as tasty if you were to replace milk as water. If you are someone who likes sweet stuff, do add a couple more tablespoons of sugar.
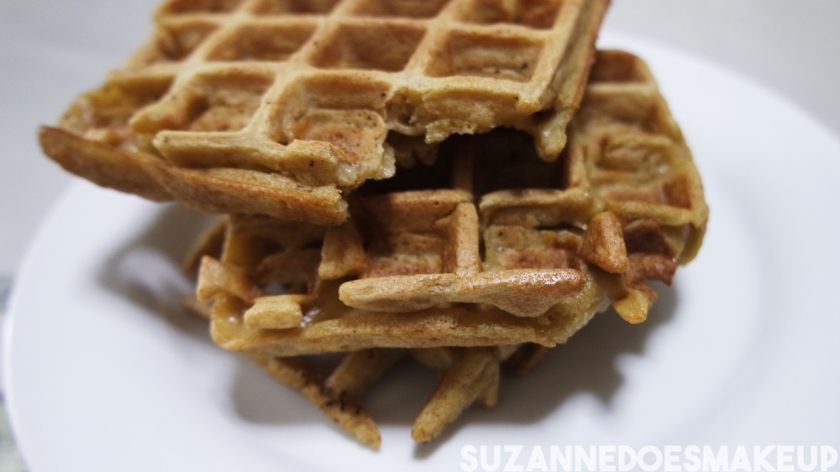
I hope you will enjoy my fluffy and crispy waffle recipe. Don't be like me and over whip the egg white.
Subscribe to:
Posts (Atom)


